bookme for Tutors and teachers
Lessons repeat, families have busy calendars, and payment is often awkward. bookme lets students book lessons and pay in advance.
What you will learn
- Create an event type
- Get paid when people book
- Set your hours and protect your week
- Run a webinar or group session
- Automate reminders and follow ups
- Share your link where people already are
Who this is for
Private tutors, music teachers, language teachers and instructors who sell lessons or small group classes.
Lessons are a regular rhythm, and the hardest part is the first booking. Families coordinate several calendars, and the tutor has to fit lessons around school hours, work and travel.
bookme gives families a link to see what is open and choose a time, and gives you a way to take payment in advance.
The scheduling problems in tutoring and teaching
Parents and students juggle times
Collecting payment
Different lengths and subjects
Missed lessons
How bookme solves it
- Self booking. See how to create an event type.
- Paid lessons. See how to create a paid event.
- Group classes and webinars. See how to create a webinar.
- Reminders. See how to create an email workflow.
See bookme in action
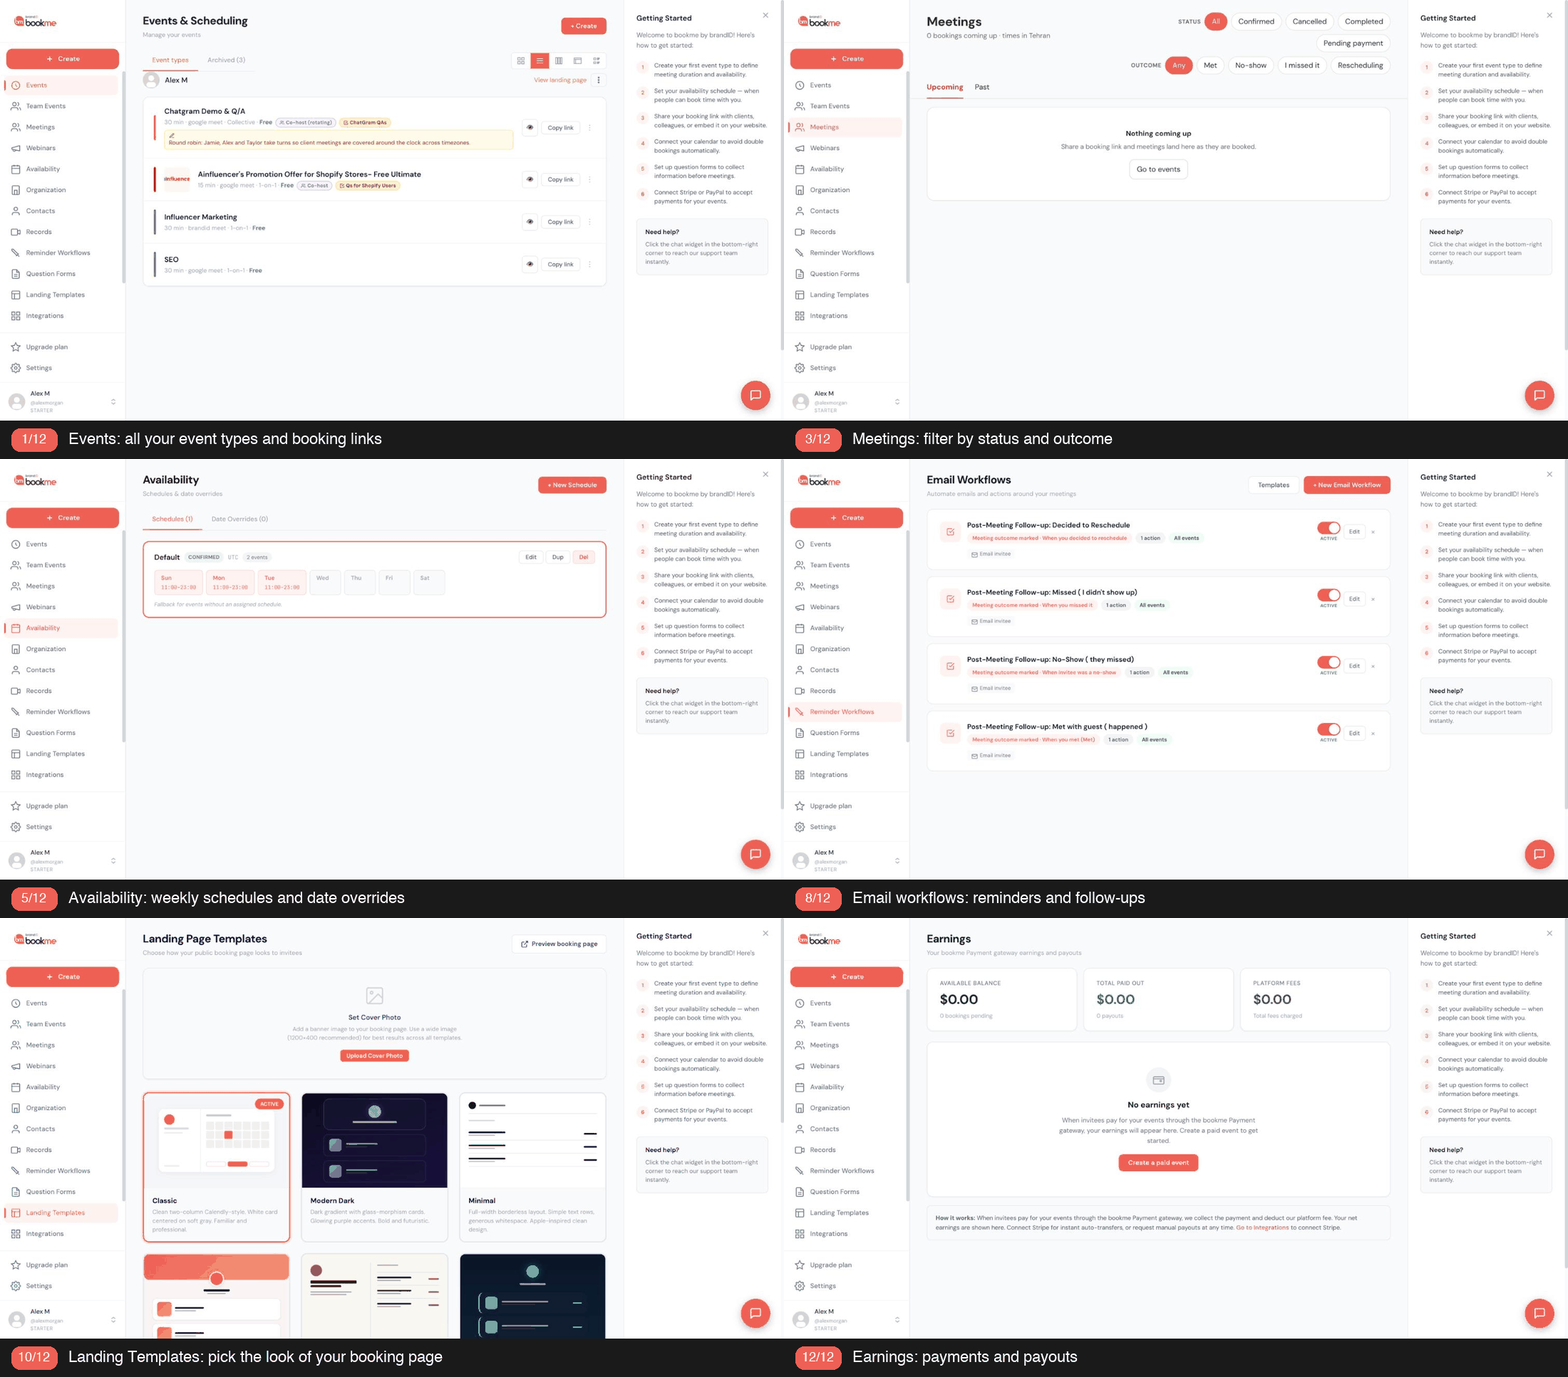
This short tour shows the dashboard you will use in the steps below: your events, meetings and settings in one place.
Set it up step by step
Create an event type
Trial, regular and exam lessons need different setups.
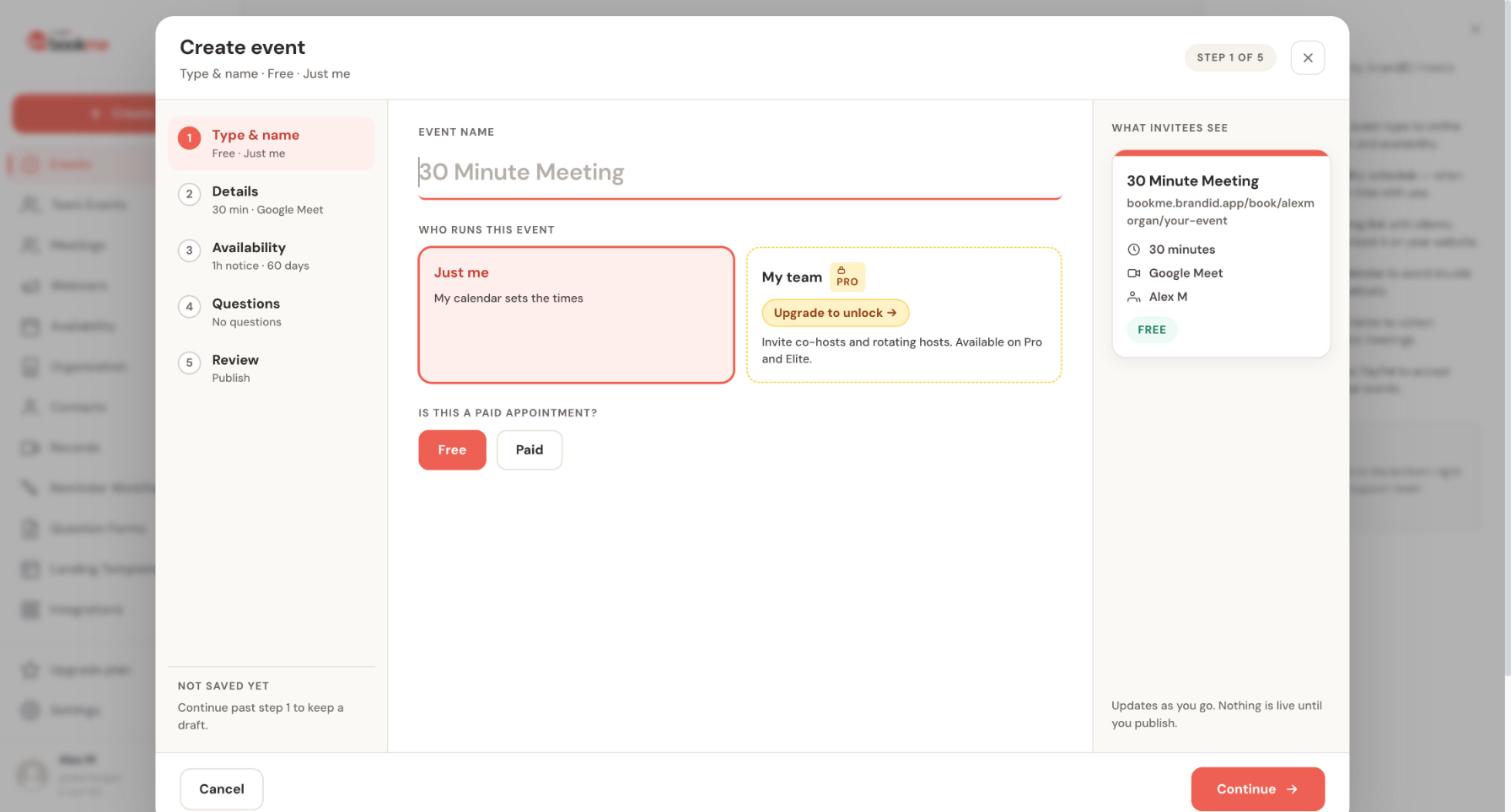
An event type is a meeting you offer, such as a 30 minute intro call. The Create event wizard builds one in five steps and keeps nothing public until you publish.
- On the Events page click + Create. The wizard lists five steps: Type & name, Details, Availability, Questions and Review.
- Name the event and choose Just me or My team, then choose Free or Paid.
- In Details set the description, the duration and the location: Google Meet, Zoom, brandID Meet, Phone call or In person.
- In Availability choose a schedule, how much notice you need, how far ahead people can book, an optional cap on bookings per day and buffers before and after each booking.
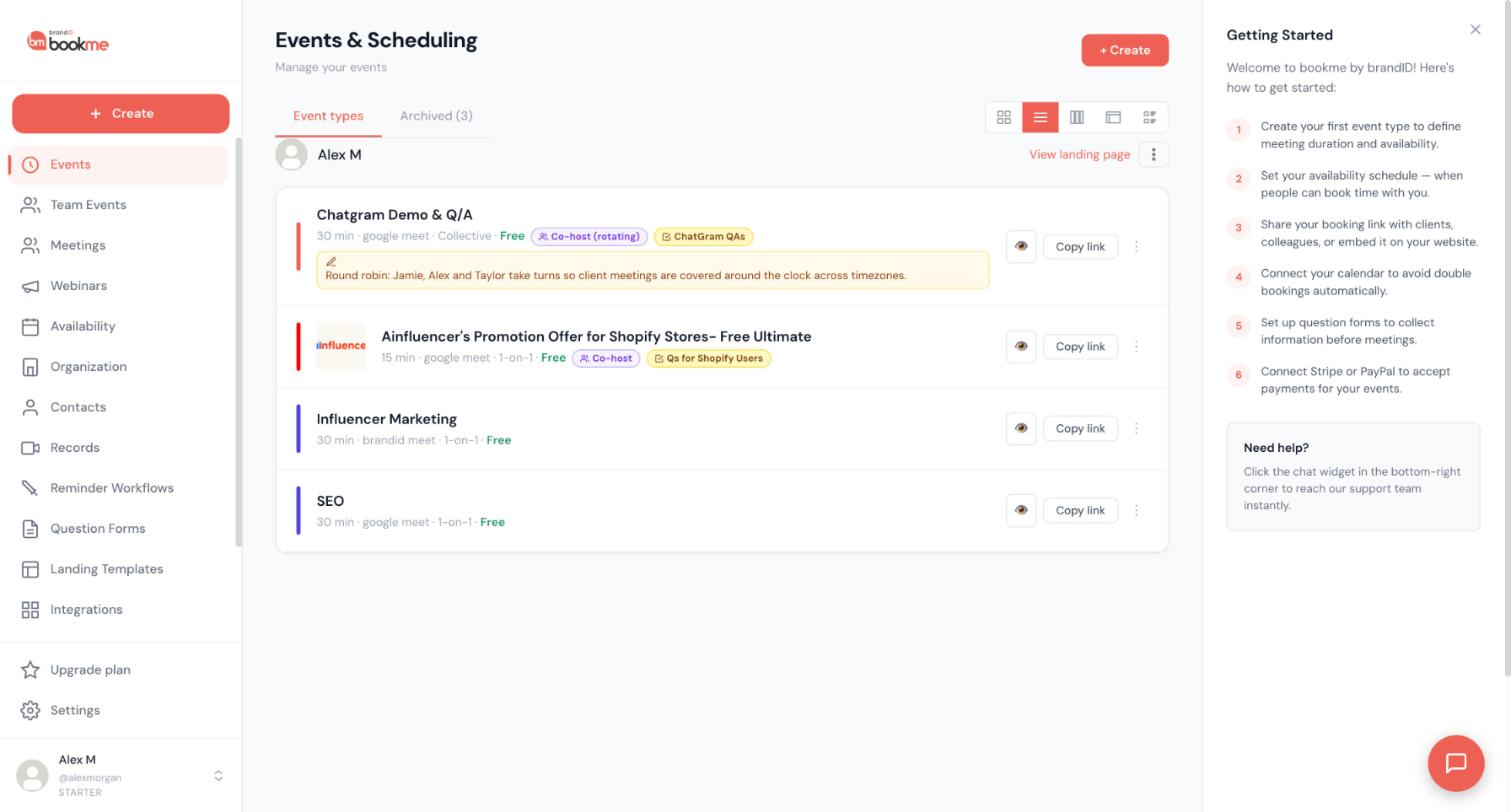
- Click Publish event, then use Copy link on the Events page to get the event’s direct link.
For tutoring and teaching:
- Create a free 20 minute trial and a paid 50 minute lesson.
- Create one event per subject.
Full guide: how to create an event type.
Get paid when people book
Prepaying removes awkward chasing.
Turn any event into a paid appointment by choosing Paid in the Create event wizard, then set the price and how you get paid. Invitees pay after they pick a time.
- Decide which gateway to use: the bookme Payment gateway, your own Stripe or your own PayPal. If you choose your own, connect it first under Integrations, then Payments.
- Click Create, name the event and choose Paid.
- Enter the price and currency (USD, EUR, GBP, CAD, AUD or IRR) and choose how you get paid.
- Continue through Details, Availability and Questions, then publish.
- After the invitee picks a time they go to checkout, the slot is held for about 30 minutes, and the booking shows Pending payment in Meetings until it is paid.
For tutoring and teaching:
- Set the lesson price and currency.
- Keep the trial free.
Full guide: how to get paid when people book.
Set your hours and protect your week
Lessons fit around school hours.
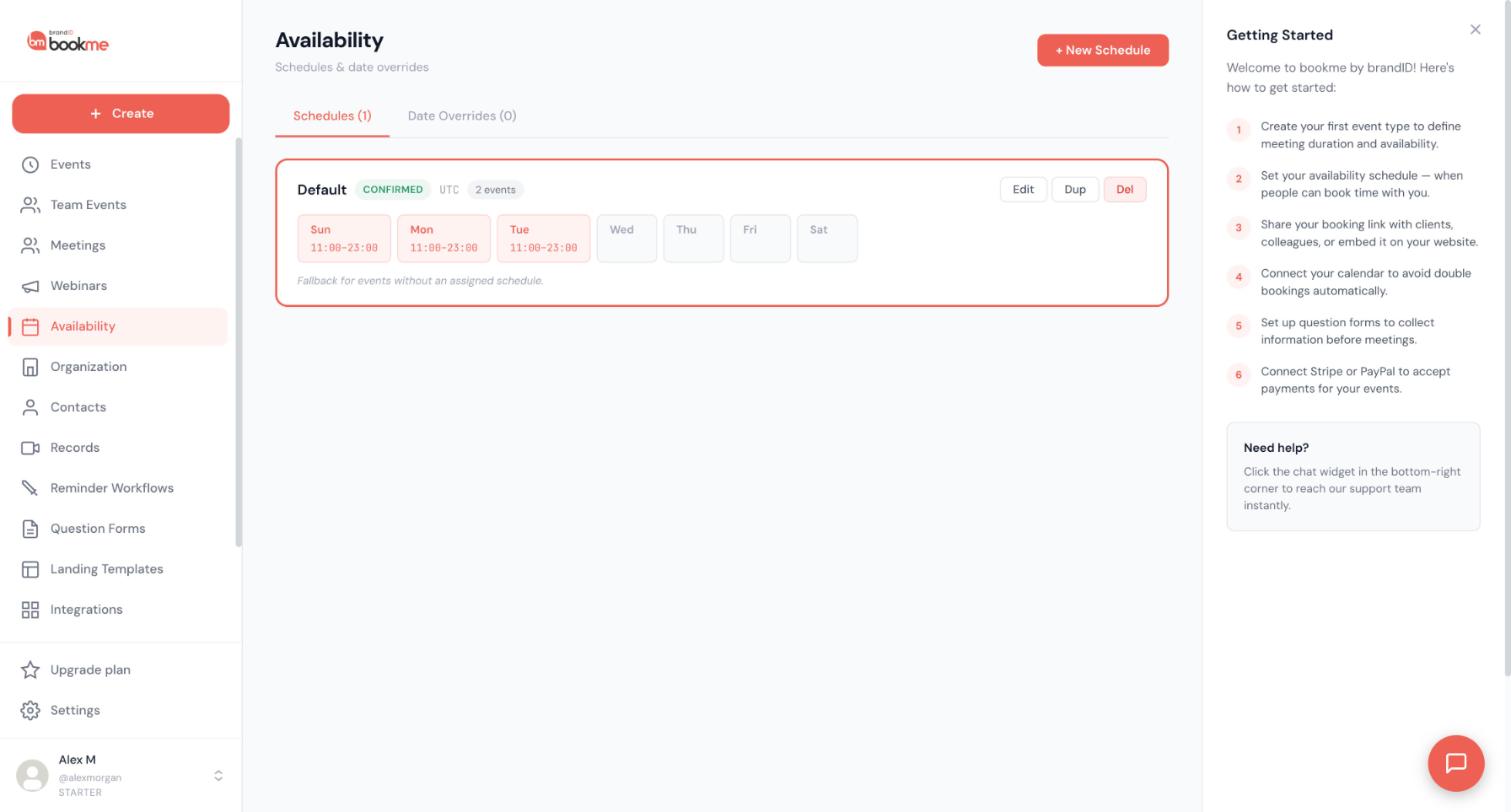
Your weekly hours decide which times invitees can book. You set them once in a schedule, and every event that uses that schedule follows it.
- Click Availability in the sidebar and press Edit on the Default schedule.
- Switch days on or off, set a start and end time, and add more than one time window to a day if you need a break in the middle.
- Use Copy to all to repeat one day’s hours on the others, and check the schedule’s time zone before you save.
- Click + New Schedule when some events need different hours, for example paid sessions only on certain days, then assign that schedule in the event’s Availability step.
- In each event, add a minimum notice, a limit on how far ahead people can book, a cap on bookings per day and buffers before and after.
For tutoring and teaching:
- Open slots only when you want to teach, such as 4 to 8 pm.
- Add buffers between lessons.
Full guide: how to set your hours and protect your week.
Run a webinar or group session
Small group classes can run as a session with its own attendee list.
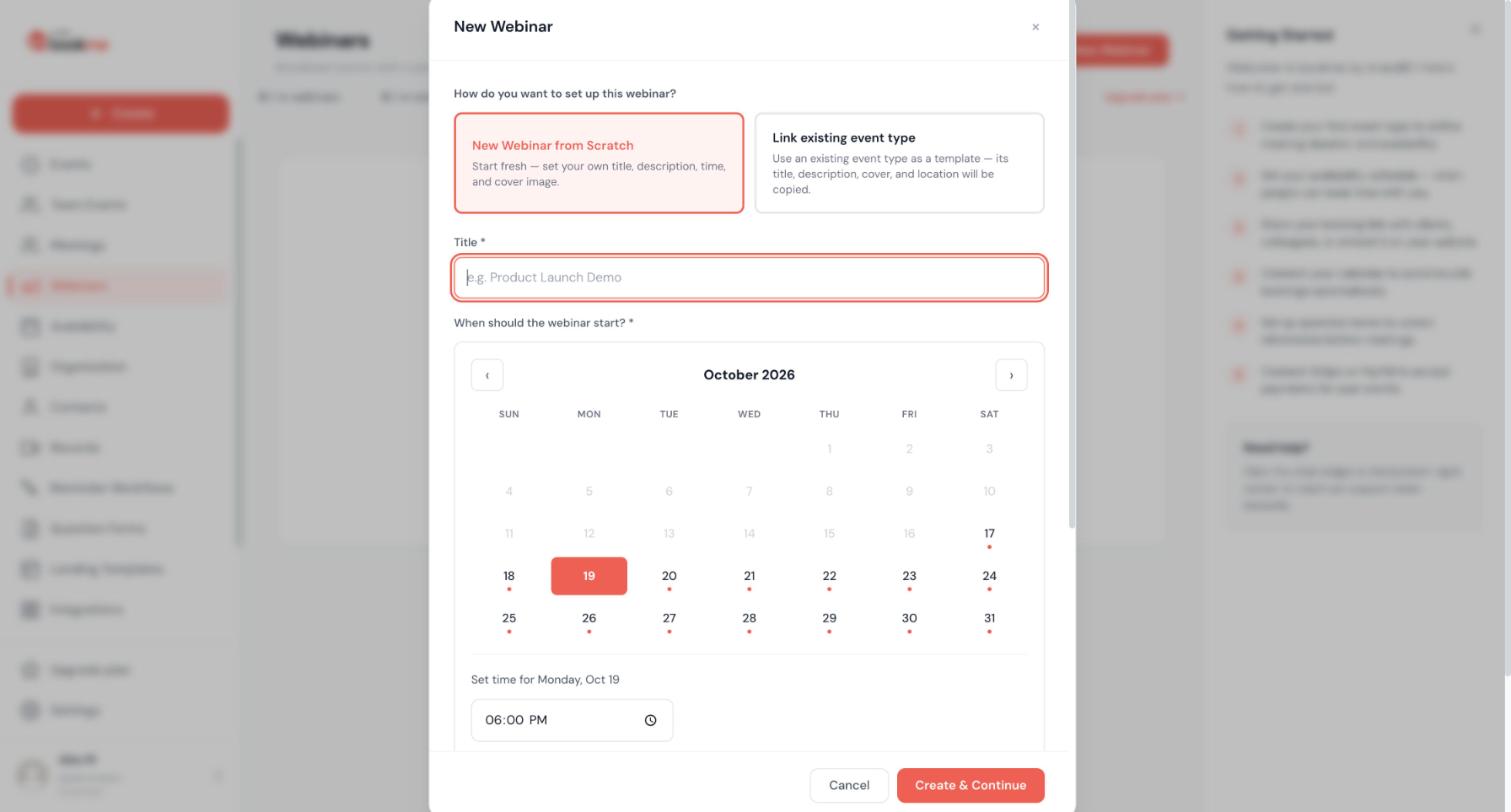
A webinar is a session at a fixed date and time with its own attendee list and emails. You can start one from scratch or from an event type you already have.
- Click Webinars in the sidebar, then + New Webinar.
- Choose New Webinar from Scratch, or link an existing event type.
- Enter the title and pick the start date and time, then click Create & Continue.
- Complete the details: description, cover image, time zone, duration and meeting type.
- Send invites and reminders from the webinar itself, because emails go out only when you send them.
For tutoring and teaching:
- Create the class and set the details.
- Use seats on an event type as another option.
Full guide: how to run a webinar or group session.
Automate reminders and follow ups
Reminders cut missed lessons.
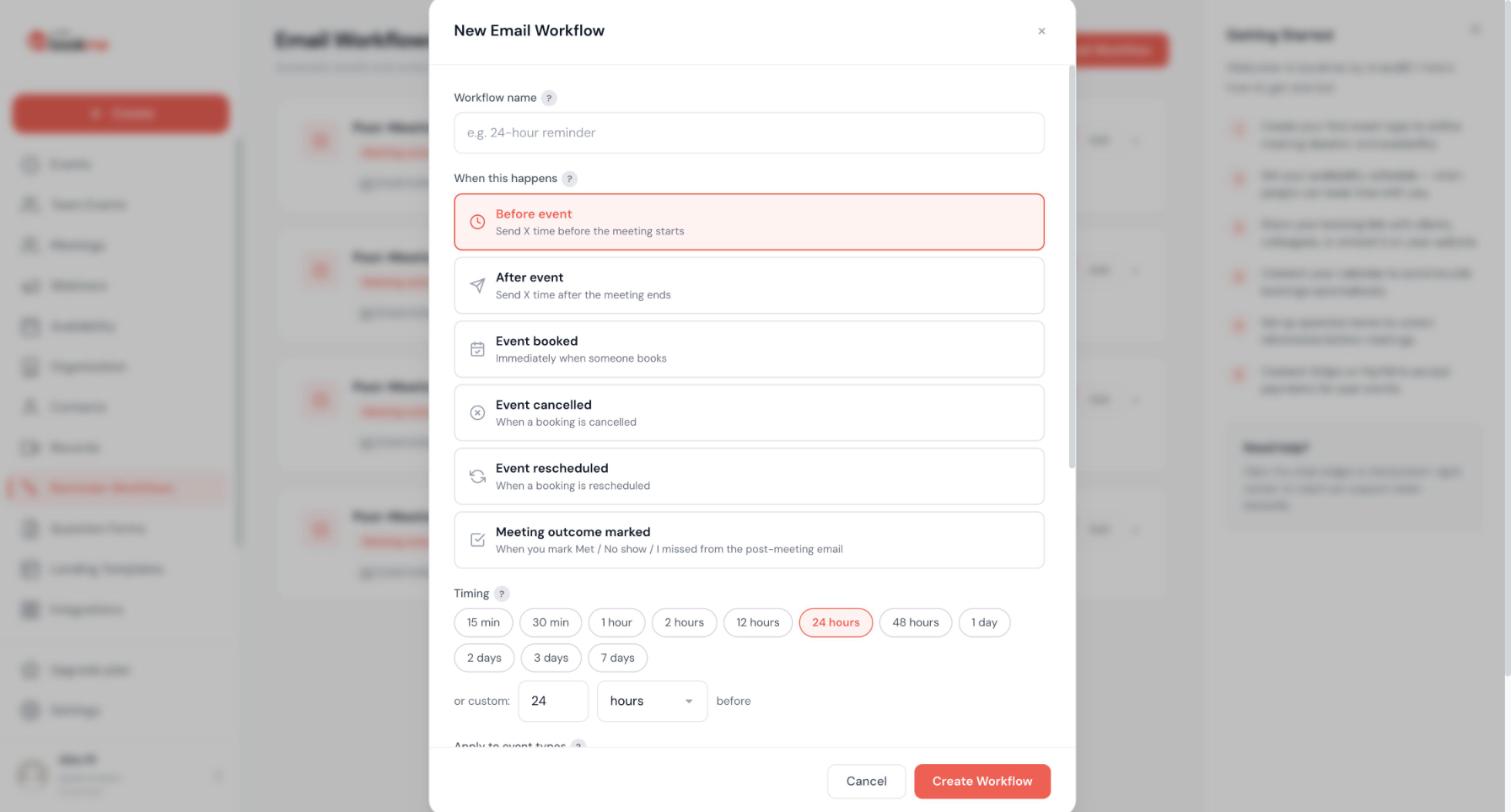
An email workflow sends an email when something happens around a meeting: before it, after it, or when it is booked, cancelled, rescheduled or marked with an outcome.
- Click Reminder Workflows in the sidebar, then + New Email Workflow, and name it, for example 24-hour reminder.
- Under When this happens choose a trigger: Before event, After event, Event booked, Event cancelled, Event rescheduled or Meeting outcome marked.
- For before and after triggers pick a timing chip such as 15 min, 1 hour or 24 hours, or enter your own.
- Choose which event types it applies to, leave it empty for all, and write the subject and body. You can insert merge variables such as {{invitee_name}} and {{event_name}}.
- Click Create Workflow and test it first with your own address.
For tutoring and teaching:
- Send a reminder the evening before.
- Add a thank you with the next lesson link.
Full guide: how to automate reminders and follow ups.
Share your link where people already are
Parents need one simple link.
bookme gives you a link for your whole booking page and a direct link for each event type. Copy the one that fits and put it wherever people reach you.
- Use your booking page link when you want people to choose from every live event, and a direct event link when you mean one specific meeting.
- On the Events page click Copy link on an event card, or the small menu next to View landing page for your whole page.
- Click the eye icon to preview an event the way an invitee sees it, and try it on your phone.
- After you publish, copy the email signature line, or use the share buttons and QR code on the event is live screen.
- Keep your username and event slugs stable, because they are part of the links you have already shared.
For tutoring and teaching:
- Share the booking page in a group message.
- Add the link to your profile.
Full guide: how to share your link where people already are.
Case study: a language tutor with trial and regular lessons
A tutor creates a free 20 minute trial lesson and a paid 50 minute lesson. For small group classes, the tutor uses a webinar style event with a seat limit. Students receive reminders before each lesson.
The tutor also uses a short form to ask what level each student is at.
Families also like predictability. When the same weekly slot is easy to rebook from the confirmation, the lesson becomes part of the household routine, and the tutor spends less time managing messages and more time preparing material for each student. Over a term this adds up to hours returned to teaching.
Before and after
Before:
- Parents and tutors trade several messages to find a time
- Payment arrives late or after a reminder
- Every student gets the same kind of lesson slot
- Group classes are tracked in a spreadsheet
After:
- Families pick from times that already suit you
- Lessons can be paid for at booking
- Trial, regular and exam lessons each have their own event
- Group classes have a seat limit and reminders
A typical week with bookme
After school hours are busiest. The tutor opens slots between 4 and 8 pm on weekdays. Families book a trial, then a regular weekly lesson. On Saturday morning a small group class runs with a seat limit. Reminders go out the evening before.
Parents use the reschedule link when a lesson clashes with something else.
Launch checklist for tutoring and teaching
Tick these off before you share your link.
- Trial and lesson events exist.
- Hours match when you teach.
- Payment is tested.
- Reminders are on.
- Parents have the link.
Common mistakes to avoid
- Opening hours that you do not actually want to teach.
- Skipping trial lessons.
- Not asking the student’s level.
Tips that make it work
- Open fixed lesson times. Set weekly hours around when you actually teach.
- Offer a trial lesson. A free first session lowers the barrier for new families.
- Ask for level and goal. This helps you prepare materials.
- Use reminders. A reminder the day before reduces missed lessons.
- Share the link with parents directly. A message or school group post with the booking link saves a round of questions.
- Review the term. At the end of each term, look at which lesson slots filled and adjust next term’s hours.
Let your AI assistant do the setup
bookme works with Claude, ChatGPT and other MCP apps, so you can describe what you want in plain words and let your assistant build it. Anything that reaches another person, such as cancelling a meeting or emailing an invitee, waits for your approval first. Here is an example request for tutoring and teaching:
Create a free 20 minute trial lesson and a paid 50 minute lesson, open Monday to Friday 4 to 8 pm, with a reminder the evening before.
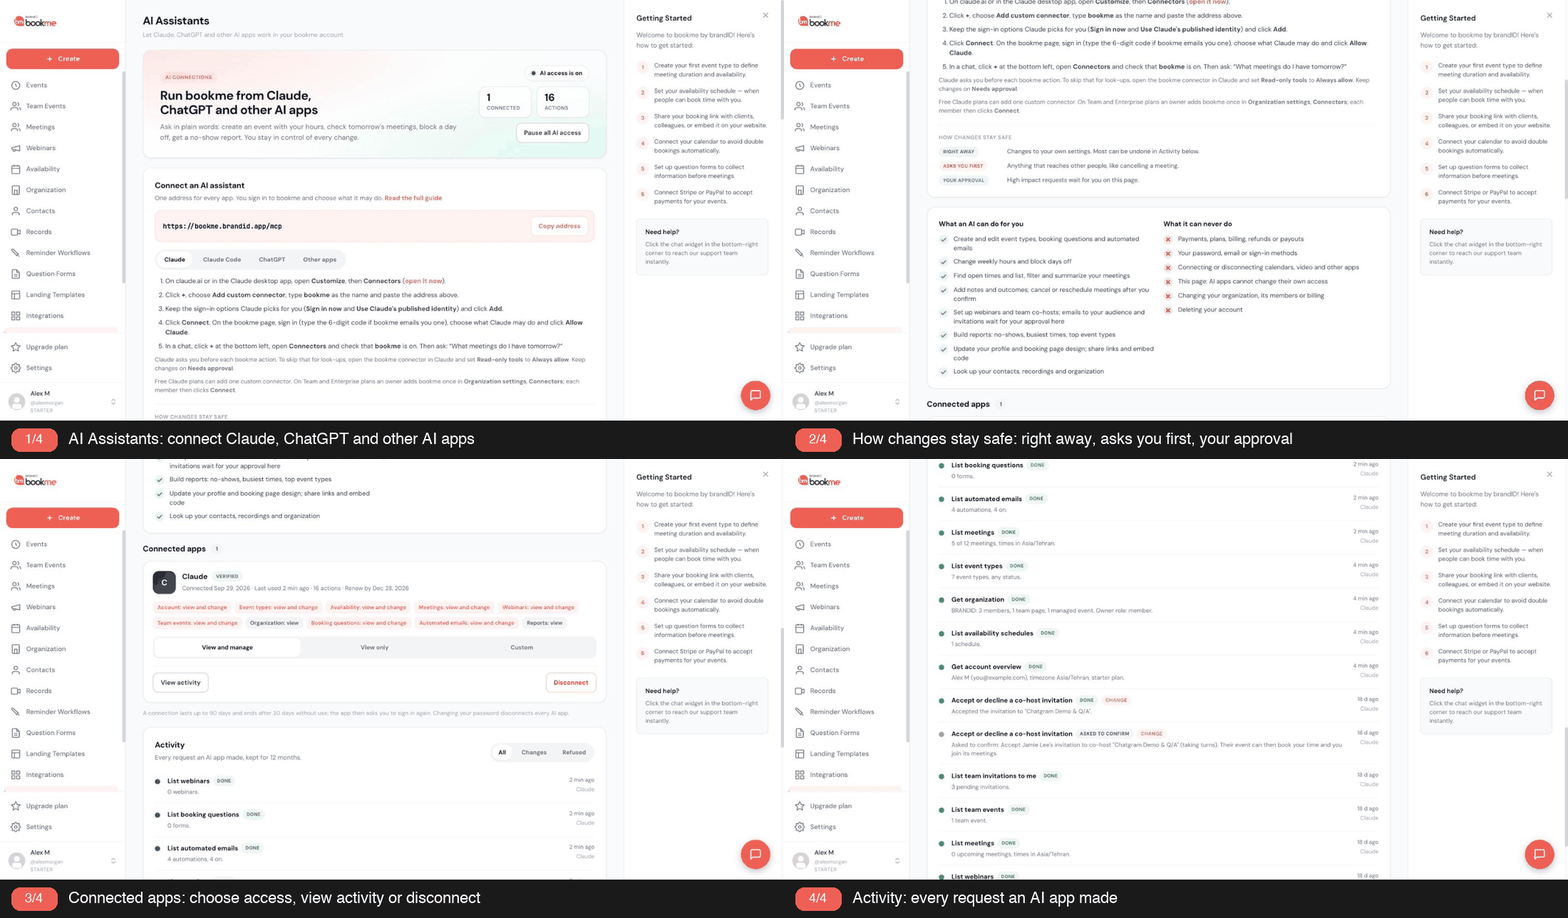
Setup guide: how to connect Claude to bookme.
Words you will see
- Event type. A meeting you offer, with its own length, location, price and rules.
- Schedule. A set of weekly hours that events can follow.
- Booking window. How much notice you need, and how far ahead people can book.
- Buffer. Time kept free before or after a booking.
- Question form. Custom questions invitees answer before they book.
- Collective event. All hosts attend, and a time is offered only when every required host is free.
- Round robin. Hosts take turns, with one host per booking.
- Email workflow. An email sent automatically before, after or around a meeting.
- Outcome. What happened to a meeting: Met, No-show, I missed it or Decided to reschedule.
Frequently asked questions
Can I run group classes?
Can students pay in advance?
Can a parent book for a child?
Do students need an account?
Can I limit the number of students in a class?
Can I change my lesson hours between terms?
Can I offer lessons in more than one subject?
Ready to try it?
Create a trial lesson and share the link with new students.